Post-Installation Checklist: What to Inspect Before You Sign Off on New Windows
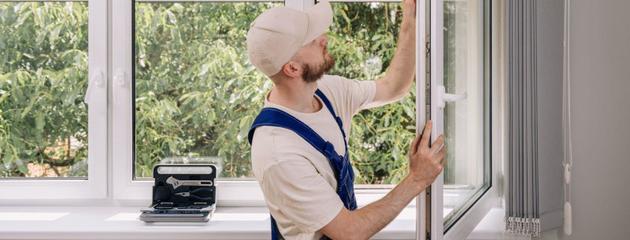

A post-installation window inspection means you test every new window while the crew is still in the house, so you fix a missed lock, a sash that sits high, or a gap at the trim before the truck leaves.
A new window installation is finished only when the sash works, the glass matches the order, and the finishes are sound. The opening should be clean, and the paperwork should match the job. Walk each opening with the installer, and keep the labels and invoice in case a rebate program asks for them later.
Key Takeaways
- Check every window while the crew is still there, because small adjustments are fastest on installation day.
- Open, close and lock each sash, and ask for a demonstration of any tilt, crank or TrueCrankless handle before you sign.
- Fog between the panes is a sealed unit to report. Moisture on the room side is humidity and not a defect.
- Leave rebate labels in place until you have checked that program's rules, and keep an invoice that lists each unit.
- The 25-year transferable warranty on windows covers the components and the installation labour when our crews do the work.
Why Does the Final Walkthrough Matter?
Check a replacement window installation while the crew is still on site. That is when a lock, a reveal or a seal can be set right without a second trip.
A new window installation from Canadian Choice Windows & Doors™ includes removal of the old windows and trim, plus disposal. Every installer is factory-trained, and the crew is in-house, not subcontracted. Before the new unit goes in, the crew replaces faulty or deteriorating frame components in line with Canadian Standards Association (CSA) guidelines. That is why the walkthrough is your chance to see the finished opening, not just the new glass.
Painting, blinds and drywall repair sit outside that scope unless the contract lists them. Most homes take one to two days. Use that time to inspect every opening, room by room, with the installer beside you. Start in the room the crew finished first, so the caulking there has had the longest time to set.
A bad window installation is a sash that will not lock, a gap along the trim, or glass that does not match the order. The reveal, the even strip of frame you see around a closed sash, is the quickest tell. If the reveal is wide at one corner and tight at the other, the sash is not square. A square sash closes with the same light pressure at every corner.

Operation and Hardware: Test Every Window
Test every window before you sign. It should open and close without force, the lock should catch fully, and the closed sash should sit even in the frame.
If the unit tilts, cranks or opens a second way, ask for that movement once. Check every opening, including the basement. You should not have to lift the sash to make the lock catch.
What Should You Test on Each Sash?
Each sash gets the same five checks, and doing them in the same order at every opening means nothing is skipped. Start with the movement, because a lock that misses is often a sash that sits slightly off. Then look at the hardware, the screen, and the gaps around the closed sash. The list below follows the order an installer would use.
- Open and close. The sash moves steadily and returns to the same closed position.
- Lock. The hardware catches fully, without a shove.
- Tilt or crank. A tilt sash tilts and returns. A crank turns without grinding.
- Screen. It sits square and comes out the way the installer shows you.
- Sight lines. The gap around the closed sash is even, with no rub at one corner.
On a TrueCrankless window , one handle does three jobs. Up tilts the top in, across swings the sash into the room, and down locks it. In the locked position, steel locking points close into the frame on all four sides, so the handle should feel firm with no half-latched position. Ask to turn that handle yourself, and pull the TrueSCREEN across and back to check that it folds away cleanly.
"Walk each opening with us before the truck is packed. Open the sash, close it, and turn the lock, then try the tilt or the crank if that window has one. A sash that sits a little proud is a short adjustment while we are still there, so point it out on the spot," notes Tony Wong, Project Manager at Canadian Choice Windows & Doors™ .
If a patio door went in the same day, latch it and lock it too. A patio door that sticks is adjusted on its own rollers or track, not in this window check.
What Should You See in the Glass?
You should see the glass you ordered, with no crack, no deep scratch, and no fog between the panes. A light film you can wipe off the room side is not a broken seal.
A cracked pane and fog inside the unit are different faults. The crack is damage in one sheet of glass. The fog sits inside the sealed unit, the space between the panes, where a cloth cannot reach it.
How Do You Check the Glass?
Look with the light crossing the surface, not straight at it. A scratch that hides head-on often shows at an angle, so stand to one side of each pane and then the other. Check the corners and the centre, because a chip near the edge is easy to miss behind the sash. The three checks below cover what to look for on every pane.
- No crack. A crack in one pane is damage worth pointing out, even if the other pane is whole.
- Right glass. Clear, privacy or triple pane matches the order for that opening.
- No fog between the panes. Report any moisture you cannot wipe away from either side.
The glass can be sound, and the labels can still matter. Treat those as two checks.
When Should the Labels Stay On?
Some programs want the ENERGY STAR label left on until an inspector has seen the unit. Efficiency Nova Scotia's Home Energy Assessment is one of them: ENERGY STAR stickers must remain on the windows until after the final assessment. For homeowners working with our window installers in Halifax , that rule applies to every unit in the program. The same guide counts a bay window of three units in one rough opening as a single rebate, so a bay is one opening on the claim.
Read your own program's rules before you peel anything. Ask that the invoice list the NRCan ENERGY STAR reference number and the U-factor for each unit, because that is the detail a program checks. Keep the invoice and receipts for at least five years, as the Efficiency Nova Scotia guide asks participants to do. A sticker on a unit the program does not list will not create that rebate.
Inside: Trim, Sealing and Clean-Up
Inside, the trim should be straight and held tight, the gaps at the frame should be filled, and the old window should already be gone. Run a hand along the sill while the crew is still there. A proud nail is easier to feel than to see from the doorway.
What Should the Interior Finish Show?
Window caulking interior to the new trim should be continuous, with no open joint at the wall. Press the trim. It should not rock.
- Trim. It is straight, tight to the wall, and it does not move when you press the end.
- Filled gaps. You do not see daylight at the interior frame line.
- No new damage. The walls, sill, and floor show no fresh gouges or torn drywall.
- Old unit gone. Removal and disposal are part of the job, so the old window should not stay in the room.
Sweep the work area and lift the coverings. Painting, drywall patches and blinds are included only when the contract says so.
Outside: Caulking, Capping and Drainage
Outside, the joint should be sealed, the capping or trim should sit tight, and water should have a way out of the frame. A neat bead that plugs the drain doesn't finish the opening. Check the head and the sill, because a gap in the top capping lets water in above the unit.
What Should You Check on the Exterior?
Caulking around windows should run continuously along the joint, including the corners, and it should not smear across the glass. Capping or exterior trim should lie tight to the siding or brick. Look for a lifted edge, a missing piece, or a new chip in the cladding.
Window weep holes at the bottom of the frame let water leave the system. They should be open, not buried in caulking. If they are packed shut, a freeze leaves that water nowhere to go. A quick test is to pour a little water into the bottom of the frame and check that it drains outside within a minute or two.
Paperwork Before You Sign Off
Do not sign until the invoice matches the order and any unfinished item is written down. A single total, with no window count, is hard to check later.
If trim is still on order, name the room and the missing piece. A line that only says touch up later is too vague to finish.
- Count and style. The invoice matches the windows, styles, and glass, opening by opening.
- Product details. The NRCan reference number and the U-factor are listed for each unit that has them.
- Warranty papers. You have them to keep with the invoice.
- Open items. Write down anything unfinished, including any return visit you agreed to.
Compare that note with the window replacement quote before the crew leaves, so you accept the scope you actually signed.
What Is Normal on Your First Cold Night?
Condensation on new windows is common on the first hard night, and it does not by itself mean the installation failed. Moisture on the room-side surface is humidity meeting cool glass. Fog you cannot wipe from either side sits between the panes, and you should report that sealed unit.
Warm room air carries water vapour. The glass is often the coldest surface nearby, so the vapour can bead where a cloth will remove it. Health Canada recommends keeping indoor relative humidity between 30% and 50% , and a home that sits above that range in winter will show it first on the glass. A simple hygrometer tells you which side of that line your house is on before you worry about the window.
If the film keeps coming back, humidity and still air at the glass are the usual reasons crying windows show up through a Canadian winter.
If that moisture freezes, you are looking at ice on the inside of the glass. Cool glass on a hard night is not a failed seal, and it is not a reason to reopen the sign-off.
What Does Your Warranty Cover, and How Do You Report an Issue?
The 25-year transferable warranty covers the frame, sealed glass unit, hardware, painted finish, and screen. Installation workmanship and labour are covered for the same 25 years, and the warranty applies to windows that Canadian Choice Windows & Doors™ manufactures and installs. If you sell the house, you can transfer the warranty to the new owner. The full terms are set out in writing with your quote and on the warranty page.
TrueCrankless windows carry a 40-year transferable warranty, and their hinges, pivots and lock gear are covered for the same term. The glass coverage is for sealed-unit failure, including moisture between the panes. Moisture on the room side is a humidity issue, not that failure.
If a problem shows up later, write down the room, what you see, and when it started. A photo of the window helps the team see the issue before the visit. Send that note as a claim through the warranty page, or call your local office. We handle claims directly, so there is no second company to chase.
"When something needs attention after the install, the most useful thing you can send us is a short note with the room, a photo, and when it started. That lets us book the right technician and bring the right part on the first visit. Report it early, even a small one, because a quick fix in the first season is easier for you than waiting for spring," explains Helen Sin, Consumer Success Manager at Canadian Choice Windows & Doors™ .
Printable Checklist
Keep these lines with you while you walk the house. Each one is a yes or no, and each one should take under a minute. Mark a no while the installer is still beside that opening.
Window Inspection Checklist
Each line below rolls up one section of this guide into a single yes or no. Work through them in order at each opening, then once more for the whole house before you sign. A no is not a failed job, only a line to finish while the crew is still on site. Keep a pen ready so you can note the room beside any line that needs a second look.
- Operation. Each window opens, closes and locks, and any special handle has been demonstrated.
- Glass. No cracks, no fog between the panes, the ordered glass, and labels left on if the program requires them.
- Inside. Trim is tight, caulking is continuous, nothing is damaged, the old window is gone, and the area is clean.
- Outside. Caulking is continuous, capping is tight, and weep holes are clear.
- Paperwork. The invoice matches, the details are listed, and open items are written down.
If a line is a no, write it on the completion paperwork before you sign.
Sign Off Only After the Window Inspection Is Done
A window inspection on installation day is the pass that counts. Every sash has been operated, the glass matched the order, the finishes checked, and the papers put in your hand. It will not answer a humidity film on the first cold night. It will not add painting or blinds that the contract never included.
Write down any line that is still open, then sign. When you want the work booked, book a free consultation . We will measure the openings and walk through what the crew will finish.
Frequently Asked Questions
What Should I Check Before the Installers Leave?
Check every window while they are still there: open, close, and lock it; check the glass; and check the trim inside and outside. Ask them to demonstrate any tilt, crank or second handle position. Confirm the invoice matches the order, and write down anything still open. Adjustments are fastest before the crew leaves.
Is Condensation on New Windows a Sign of Bad Installation?
Not when the moisture is on the room side and you can wipe it off. That is indoor humidity on cool glass, and it is not a defect. Fog or droplets between the panes that you cannot wipe from either side point to a failed seal and should be reported. A cool pane on a hard night is not, by itself, a failed install.
Should I Remove the Stickers from My New Windows Right Away?
Not until you have read your rebate program. Some programs, including Efficiency Nova Scotia's Home Energy Assessment, require the ENERGY STAR label to stay on until the final assessment. If your program has no such rule, the stickers can come off once you have the invoice. Ask that the invoice list the NRCan ENERGY STAR reference number and the U-factor for each unit.
What If I Find a Problem a Few Weeks After Installation?
Write down the room, what you see, and when it started, and report it rather than waiting for spring. A lock that misses or a gap at the trim is still worth a call. Report fog between the panes as a sealed-unit issue. Room-side moisture that wipes off is a humidity issue, not a reason to treat the window as failed.
Does the Window Warranty Cover the Installation Work?
Yes. Installation workmanship and labour are covered for the full 25 years. So are the frame, sealed glass unit, hardware, painted finish, and screen. That 25-year transferable warranty applies to windows our crews install, and it transfers to a new owner if you sell. The full terms come in writing with your quote.

1000’s of Colours & Textured Finishes
Transform your home from ordinary to extraordinary with our new coloured and non-glare textured finishes. Available in a wide array of colours as well as custom matched colours for your very own personalized design.
Our Most Popular Replacement Window Colours: