All You Need to Know About Converting Flat Windows into Bow Windows


Think it’s time to exchange the flat windows for something more aesthetic, more appealing? One of the best ways to achieve this is to go for bay windows. They are both aesthetic and functional, with a unique appeal that suits both traditional and modern home designs.
With bow windows, you can increase the sense of space and natural light in any room. And, you can do that all while boosting your home’s curb appeal. However, it sounds like a simple renovation to many homeowners.
However, it’s essential to comprehend the steps involved in the process, as well as the various challenges that arise during it. To ensure the project runs smoothly and yields desirable results, you need this guide to help you. Here’s more!
Key Takeaways
- Converting flat windows into bow windows will help you create a better sense of space, natural light, and curb appeal
- You will need proper structural reinforcement to support the added weight and projection of a bow window
- With accurate measurements and professional installation, you can ensure a secure fit and long-term durability
- Bow windows come in various panel configurations and materials for flexible design options that match your home’s style
- Regular maintenance – like sealing, cleaning, and frame inspections – also helps preserve performance and prevent damage over time
The Conversion Process – A Step-by-Step Guide
Before you dive into your project, we suggest reviewing a few key steps involved in the process. When you understand which step comes first and what’s more important compared to other tasks, you can ensure a safe and smooth conversion.
Step 1: Structural Assessment
The first step is to make sure your home’s structure can support the new bow window because bow windows are larger and heavier than standard flat windows. Therefore, you need reinforcement during installation to avoid compromising your home’s structural integrity.

You should rely on a professional window installer who can assess your home’s frame and foundation to ensure a proper fit. To ensure a proper fit. Moreover, a professional will inspect the load-bearing walls to determine whether you require additional support.
In many cases, they add a header support system to bear the additional load from the bow window. Also note that this system often requires additional framing or a lintel (a horizontal beam) for stability.
Additionally, the success of any window installation project, especially with bow windows, hinges on proper structural support. If you don’t have it, the windows won’t install properly, and as a result, they won’t perform properly.
Step 2: Removal of Existing Window
Once the professional assesses and confirms the structural support, they will guide you in removing the existing flat windows. This part of the process is perhaps the most challenging because you need to be precise to avoid damaging the surrounding wall (or frame).
Here’s how the removal process generally works:
- Safety first – Make sure the area is clear and protected from debris. If you’re DIY-ing it, you must wear protective gear, such as gloves and goggles.
- Glass removal – Remove the glass panels very carefully. And since your windows may have larger glass sections, you should pay extra attention during this step.
- Frame removal – Next, you detach the window frame from the wall. Then, make any necessary adjustments to create a properly-sized opening for your bow window.
Tony Wong, Project Manager : Just make sure you dispose of the old window materials responsibly, especially glass, which can be hazardous.

Step 3: Structural Reinforcement
After removing the old window, the next step is reinforcing the wall structure to support the weight of the new bow window. This typically involves installing additional framing members, which might include:
- Header Beams – These beams distribute the weight of the new window, preventing our ceiling from sagging.
- Lintels – These are horizontal supports that help keep the wall stable after you create a larger opening for the bow window.
- Anchors – Depending on the window's size, you may need additional anchors to secure the window frame to the wall.
If you want windows to be in place firmly and securely, you must ensure that you don’t leave a single error during this step. Pay extra attention to detail and consider hiring a professional installer if possible.
Step 4: Measuring and Ordering the Bow Window
To ensure the bow window fits perfectly, you take accurate measurements after reinforcing for additional support. If you’re working with a professional installer, they will take precise measurements – the width, height, and depth – of the space.
After measuring, you will work with a professional supplier to replace your door for the bow window. Now, there are numerous bow window configurations to choose from. And, the style you select will depend on your preferences and your home’s overall design.
Bow windows typically consist of three to five panels that curve outward. The center panel is usually larger, while the side panels are smaller – and either fixed or operable (opening). If you’ve got a reliable and high-quality company you’re dealing with, you can also order custom sizes and shapes for specific design preferences.
Step 5: Installing the Bow Window
Since installing a bow window is a detailed process, you need to ensure that every step receives high-level care and attention to detail. After carefully reinforcing and accurately measuring, you need to fit each panel into the new structure carefully. Here’s how a professional might do it:
- Window frame placement – The installer will first place the window frame into the reinforced opening.
- Securing the window – Then the installer will secure the frame with screws or anchors, making sure it’s level and square.
- Sealing – Then, the professional will apply high-quality sealants between the window frame and the wall because proper sealing can help prevent drafts, water ingress, and heat loss.
- Window panel installation – Next, you install the individual panels, starting with the largest center panel.
- Final adjustments – The installer checks for proper alignment to make sure the window opens and closes smoothly. And, they’ll also check if all the seals are intact after the installation.

Step 6: Final Inspections
After installation, the window goes through another round of inspection for quality and performance. Here’s what usually happens during this step:
- Sealing integrity – Check all seams to make sure there are no gaps or drafts.
- Operation – Make sure all movable parts function properly, such as opening and closing windows.
- Aesthetic alignment – Check if the window panels align properly for a polished, finished look.
Potential Issues and Challenges
Yes, installing a bow window is an excellent way to enhance your home’s aesthetics. However, there are potential challenges that you should be aware of before and during the process.
Structural Concerns
One of the biggest hurdles is making sure the supporting structure can handle the additional load of a bow window. This can be especially challenging if you’ve an older home, where the foundation or framing may require significant reinforcement. In some cases, homeowners with older homes have to hire a structural engineer to assess the situation.
Installation Issues
To avoid future problems, it is essential to have a proper installation. But there are a few common issues with the installation:
- If you don’t keep the seals intact, it can lead to drafts, leaks, and water infiltration, resulting in long-term damage.
- If the bow window is not level, it can create issues with the opening and closing mechanisms, as well as aesthetic imbalances.
Maintenance Considerations
Yes, you may have to spend a little more on maintaining your new bow windows. Why? They are a little more complex than flat windows, so they require some extra care. Here’s what our professionals suggest:
- You must regularly clean both the window and the exterior panels to prevent dirt buildup and maintain the window’s appearance.
- Over time, the seals around the window may degrade. It’s essential to inspect and reapply sealant regularly to prevent water from entering.
- Check for signs of damage or warping, particularly in the wooden frames.
Cost Considerations and Return on Investment
One additional factor to consider when replacing flat windows with bow windows is the cost. The latter costs slightly more, which is why you need to weigh the pros against the cons to ensure it’s a good investment for your home.
Costs of Conversion
The cost of converting a flat window into a bow window varies depending on the window's size. Moreover, the materials you use and the installation process can also affect the final costs. Typically, a bow window installation can cost between $2,500 and $7,500, or more. This price range includes:
- Depending on the material you choose for the window frame (vinyl, wood, fibreglass, etc.), the price will vary
- Professional installation can add to the costs because it requires experienced technicians for the structural work and precise installation.
Return on Investment
Although the upfront cost may be high, bow windows can potentially increase your home's value. They increase your home’s curb appeal and create a more inviting interior space. AS a result, the bow windows can lead to a slightly higher resale value.
Design and Aesthetic Options
Finally, you should consider the variety of styles and configurations for bow windows. It will help you select the best bow window for your home’s architectural designs.
- A typical bow window has three to five panels, but you can get custom configurations.
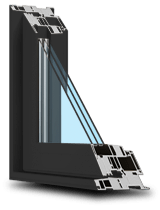
- Vinyl, wood, fibreglass, and aluminum are common frame materials.
- You can choose from various interior finishes, such as wood veneer or paint, to match your home’s décor.
Professional Installation – Why It’s Better Than DIY-ing?
The simplest reason is that professionals have more experience and expertise in working with fixtures like bow windows. Moreover, they are more skilled and proficient in dealing with window replacement processes. Additionally, to prevent any future issues resulting from gaps or improper window fits, professional-grade installation is the best option.
Conclusion
Do you think that converting flat windows into bow windows will be a worthwhile home improvement project for you? You can weigh the pros and cons of having bow windows against traditional windows to determine which is best for you.
For a better decision, consider how long-term durability and potential home value improvement may factor into it. With that said, you will require proper planning and structural reinforcement to add the new feature that will not only enhance the aesthetics of your home but also potentially boost its value.
Whether you're upgrading your home for personal enjoyment or future resale, bow windows are a valuable addition to your property. Ask the experts at Canadian Choice to help you make the right decision – you can also rely on our professional-grade installation for quicker and effective results!

1000’s of Colours & Textured Finishes
Transform your home from ordinary to extraordinary with our new coloured and non-glare textured finishes. Available in a wide array of colours as well as custom matched colours for your very own personalized design.
Our Most Popular Replacement Window Colours: