How to Accurately Measure for New Windows: A Comprehensive Guide


Replacing old, drafty windows with new, energy-efficient ones is a fantastic home improvement project that can significantly reduce energy bills, enhance curb appeal, and improve the overall comfort and value of your home. However, before you can enjoy the benefits of new windows, you need to ensure that you have accurate measurements for proper installation. Precise measurements are crucial to ensure a seamless fit, prevent air leaks, and avoid costly mistakes during the replacement window-making process.
In this comprehensive guide, we'll walk you through the step-by-step process of measuring for new windows, covering everything from the essential tools you'll need to the specific techniques for different window styles. You'll be well-equipped to tackle this project with confidence if you wonder how to measure for new windows for rough cost estimation. For precise measurements hire a professional windows installer .
Table of content
- Window Measurement Tools
- Step 1: Prepare the Work Area
- Step 2: Understand Window Terminology
- Step 3: Measure for Different Window Styles
- Step 4: Double-Check Your Measurements
- Step 5: Visit a Window Supplier
- Step 6: Consider Professional Installation
- Step 7: Prepare for Installation Day
- Frequently Asked Questions (FAQ)
Window Measurement Tools

Before we dive into the measuring process, let's take a moment to gather the necessary tools. Having the right equipment on hand will make the job easier and ensure accurate measurement measurements.

- Measuring tape : A retractable tape measure is an essential tool for this project. Look for one that is at least 25 feet long and has clear markings in both inches and centimeters.
- Level : A small level will help you determine if the window frames are plumb (vertically straight) and level (horizontally straight).
- Notepad and pen : You'll need to record multiple measurements, so having a notepad and pen handy is crucial.
- Ladder (if needed) : For windows that are difficult to reach, you may require a sturdy ladder to ensure safe and accurate measurements.
- Flashlight : Some window openings may be dimly lit, making it challenging to take accurate measurements. A flashlight can help illuminate these areas.
With your tools ready, let's move on to the measuring process.
Step 1: Prepare the Work Area
Before you start measuring, it's essential to prepare the work area to ensure accurate measurements and your safety.
- Clear the area around the window of any obstructions, such as furniture or window treatments.
- If you're working from a ladder, make sure it's positioned securely and on a level surface.
- Open the window (if possible) to gain better access to the frame and sill.
Step 2: Understand Window Terminology
To accurately measure for new windows, it's crucial to understand the terminology associated height measurements with window components. Here are some key terms you'll encounter:
- Window Sash : The movable part of the window that holds the glass panes.
- Window Frame : The stationary part of the window that surrounds the sash and is attached to the wall.
- Window Sill : The horizontal bottom portion of the window frame that extends into the interior of the room.
- Head Jamb : The horizontal top portion of the window frame.
- Side Jambs : The vertical portions of the window frame on the left and right sides.
Familiarizing yourself with these terms will help you communicate more effectively with window professionals and ensure you're measuring the correct components.
Step 3: Measure for Different Window Styles
The measuring process can vary slightly depending on the type of window you're replacing. Here are the steps for measuring windows for some common window styles:
Double-Hung Windows
Double-hung windows are a popular choice for many homes and are characterized by two operable sashes that slide vertically.
- Measure the Width : Measure the width of the window opening at the sill , middle , and top . Record the smallest of the three measurements, as this will determine the maximum width of the new window.
- Measure the Height : Measure the height of the window opening at the left side , center , and right side . Again, record the smallest measurement, as this will determine the maximum height of the new window.
- Measure the Depth : Measure the depth of the window opening from the interior trim to the outermost part of the exterior window frame. This measurement will help determine the appropriate window size and any necessary extension jambs.
Casement Windows
Casement windows are hinged on one side and swing outward like a door.
- Measure the Width : Measure the width of the window opening at the sill , middle , and top . Record the smallest measurement.
- Measure the Height : Measure the height of the window opening at the left side , center , and right side . Record the smallest measurement.
- Measure the Depth : Measure the depth of the window opening from the interior trim to the outermost part of the exterior window frame.
- Note the Swing Direction : Pay attention to the direction the window swings (left or right) and ensure that the new window matches this orientation.
Awning Windows
Awning windows are hinged at the top edge and open outward from the bottom.
- Measure the Width : Measure the width of the window opening at the sill , middle , and top . Record the smallest measurement.
- Measure the Height : Measure the height of the window opening at the left side , center , and right side . Record the smallest measurement.
- Measure the Depth : Measure the depth of the window opening from the interior trim to the outermost part of the exterior window frame.
- Note the Opening Direction : Make sure to note whether the window opens inward or outward, as this will affect the installation process.
For installing other window styles, such as bay windows, bow windows, or sliding windows, consult with a professional window installer or refer to the manufacturer's instructions for specific measuring guidelines.
Step 4: Double-Check Your Measurements
Accurate measurements are crucial for a successful window replacement project. To ensure precision, it's essential to double-check your measurements before placing an order for new windows.
- Review all your recorded measurements and verify that they are consistent across multiple points.
- If you notice any discrepancies, re-measure the affected areas to confirm the correct dimensions.
- If you're unsure about any measurements or have a complex window opening, consider hiring a professional to take accurate measurements for you.
Step 5: Visit a Window Supplier
Once you have accurate window measurements and have considered energy efficiency and building codes, it's time to call a window supplier.
- Bring your measurements and any relevant notes or sketches with you.
- Speak with knowledgeable professionals who can guide you through the selection process and ensure that you order the right windows for your specific openings.
- Don't hesitate to ask questions about different window materials, styles, and installation methods to make an informed decision.
Step 6: Consider Professional Installation
While some homeowners may choose to install replacement windows themselves, it's often recommended to hire a professional window installation company. Professional installers have the expertise, tools, and experience to ensure a proper fit of replace windows and a seamless installation process.
- Experience : Professional installers have extensive experience in window replacement and can handle even the most complex installations with ease.
- Warranty and Guarantees : Many window manufacturers require professional installation to maintain the warranty on their products.
- Safety : Window installation can be physically demanding and may require working at heights or in tight spaces. Professionals have the necessary safety equipment and training to perform the job safely.
- Efficiency : Experienced installers can complete the job more efficiently, minimizing disruptions to your daily routine.
If you decide to hire a professional, be sure to obtain multiple quotes, check references, and ensure that the company is licensed and insured.
Step 7: Prepare for Installation Day
Once you have your new windows ordered and an installation date scheduled, it's time to prepare for the big day.
- Clear the area around the windows to provide ample workspace for the installers.
- Move any furniture or valuables away from the windows to protect them from dust and debris.
- Cover nearby surfaces with drop cloths or plastic sheeting to contain any mess.
- Ensure that the installers have access to electrical outlets and water sources if needed.
- Make arrangements for children or pets to be out of the work area for their safety and the installers' convenience.
By following these steps and taking the necessary precautions, you can enjoy the benefits of your new, energy-efficient windows for years to come.
In conclusion, measuring for new windows is a crucial step in the replacement process that should not be taken lightly. By following the guidelines outlined in this comprehensive guide, you'll be well-equipped to take accurate measurements and ensure a seamless installing replacement windows. Remember, precise measurements, attention to detail, and adherence to local building codes are key to achieving a successful window replacement project. With the right tools, knowledge, and preparation, you can transform your home's energy efficiency, curb appeal, and overall comfort with beautiful new windows.
Frequently Asked Questions (FAQ)
Do I need to measure every window in my entire home?
Yes, it's recommended to measure each window opening individually, even if the windows appear to be the same size. Window openings can vary slightly due to settling or construction inconsistencies, so taking accurate measurements for each window will ensure a proper fit.
Why is it important to get accurate window measurements?
Accurate window measurements are crucial for ensuring a proper fit during installation. Incorrect measurements can lead to air leaks, drafts, and potential water damage, compromising the energy efficiency and overall performance of your new windows.
How precise do my window measurements need to be?
Window measurements should be as precise as possible, typically within 1/8 inch or less. Even a small discrepancy in measurements can cause issues during installation, so it's essential to take accurate dimensions.
What if my window openings are slightly out of square?
If your window openings are slightly out of square, it's recommended to take two measurements for both width and height: one at the smallest point and one at the largest point. This will ensure that the new window can fit properly without being too tight or too loose.
Can I measure for replacement windows myself, or should I hire a professional?
While it's possible to measure for replacement windows yourself, hiring a professional window installer can be beneficial. Professionals have the experience and expertise to take accurate measurements, even in complex situations, and can ensure that the new windows are installed correctly.

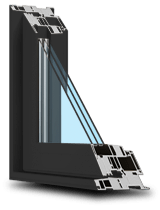
1000’s of Colours & Textured Finishes
Transform your home from ordinary to extraordinary with our new coloured and non-glare textured finishes. Available in a wide array of colours as well as custom matched colours for your very own personalized design.
Our Most Popular Replacement Window Colours: