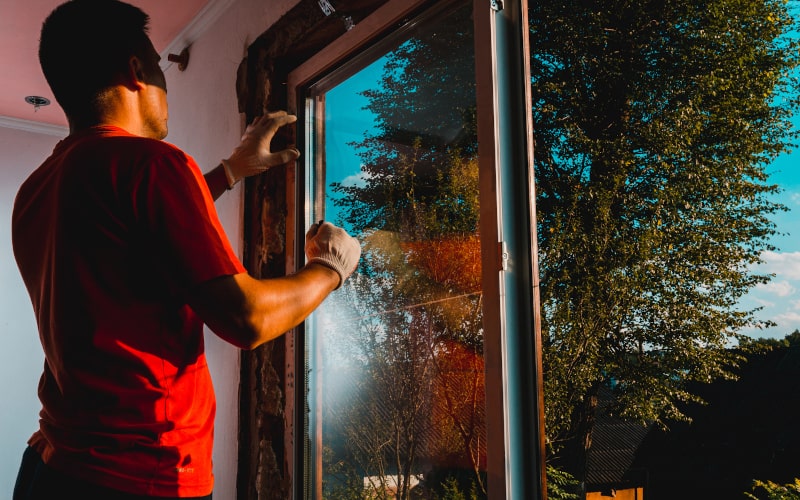
How to Safely Remove Window Film


Key Takeaways
- Removing window film properly preserves glass quality and prevents permanent damage.
- Different types of film require different removal methods based on their composition and thickness.
- Using the correct tools, protective equipment, and safety procedures ensures success without harming the glass.
- Two proven methods are heat and peel, or the black bag and sunlight technique.
- Professional assistance is recommended for stubborn or large-scale window film removal projects.
Why Removing Window Film the Right Way Matters
Window film provides a range of benefits, including enhanced privacy, UV protection, glare reduction, and decorative enhancement. However, over time, film can degrade due to exposure to sunlight, moisture, or everyday wear and tear. Bubbling, fading, discoloration, and cracking are common issues that signal it is time to remove window film.
Attempting to peel off old film without preparation can result in serious problems. Scratches caused by improper tools can permanently mar the glass surface, while adhesive residue can attract dirt and create unsightly smudges. In the worst cases, defogging lines embedded within double-pane windows can be damaged, impairing functionality and requiring costly repairs.
This comprehensive guide covers essential knowledge, including the types of window film you might encounter, the necessary tools, detailed removal methods, post-removal cleaning, and common pitfalls to avoid. Whether you’re planning a DIY project or considering professional services, following best practices is critical to achieving clean, damage-free results.
Types of Window Film and Why It Matters for Removal
Not all window films are created equal, and knowing your film type significantly influences the removal strategy.
| Type of Film | Removal Difficulty | Special Considerations |
| Standard Dyed Film | Easy | Typically, things lift easily when heated. |
| Metallic/Tinted Reflective Film | Moderate | Reflective coatings require careful heating to prevent tearing. |
| Ceramic Film | Tough | Highly durable, it demands patience and thorough heating. |
| Decorative/Privacy Film | Easy to Moderate | Vinyl-based films vary in adhesion strength. |
| Security Film | Very Difficult | A thick, multi-layered structure requires professional-grade tools. |
"Identifying the type of window film before starting removal ensures you select the safest and most effective method," explains Helen Sin, Consumer Success Manager at Canadian Choice Windows & Doors.

Security films, used for impact resistance, are particularly challenging. They consist of multiple adhesive layers designed to stay intact, making standard peeling ineffective. In contrast, decorative films may peel easily but leave adhesive residue behind.

Tools & Materials You’ll Need
Gathering the right tools before beginning makes the removal process more efficient and safer:
- Safety gloves and goggles: Protect hands and eyes from chemicals and sharp tools.
- Razor scraper or utility knife: Essential for loosening edges, but use with extreme caution.
- Spray bottle with soapy water or ammonia solution: Lubricates surfaces and weakens adhesive bonds.
- Hairdryer or heat gun: Applies controlled heat to soften film and adhesive.
- Plastic film scraper or old credit card: Non-abrasive tools for peeling without scratching.
- Paper towels or microfiber cloths: For wiping surfaces clean without lint residues.
- Garbage bags (black): Used in the black bag method to intensify solar heat.
- Optional adhesive removers include Goo Gone, a vinegar solution, or rubbing alcohol for stubborn glue spots.
Having everything on hand allows you to work methodically, reducing the risk of damage or incomplete removal.
Safety Precautions Before You Begin
Window film removal often involves chemicals, sharp blades, and delicate glass. To ensure safety:
- Test an inconspicuous corner of the film first. This step prevents surprises if the method affects glass coatings or tints.
- Open windows and ensure good ventilation whenever using ammonia-based solutions to minimize inhalation of fumes.
- Lay down protective coverings , such as drop cloths or plastic sheets, to guard window frames, sills, and flooring against spills or scratches.
- Wear appropriate personal protective equipment (PPE), including chemical-resistant gloves and safety goggles. This reduces the risk of injury from glass shards or chemical splashes.
"Taking five extra minutes to protect yourself and your surroundings can save hours of costly cleanup and repairs," advises Tony Wong, Project Manager at Canadian Choice Windows & Doors.
Step-by-Step: How to Remove Window Film (2 Proven Methods)
Method 1: Heat and Peel Method
- Heat the film with a hairdryer or low-heat gun, keeping it 3–4 inches from the surface to avoid overheating.
- Start at a corner and gently lift the edge with a fingernail or a plastic scraper.
- Slowly peel the film back at a 45° angle. This steady motion reduces the risk of tearing.
- Apply additional heat as needed for stubborn areas.
- Remove adhesive residue using the spray solution and razor scraper carefully.
This method is best for standard films and most residential applications.
Method 2: The Black Trash Bag & Sunlight Method
Highly effective for large windows exposed to direct sunlight:
- Spray the film generously with ammonia or soapy water.
- Cover the entire surface with a black trash bag, smoothing it against the wet film.
- Allow the sun to heat the film and adhesive for 1 to 2 hours.
- Peel the bag and film away at the same time.
- Wipe off any remaining residue with a scraper and cleaner.
This eco-friendly method uses solar heat to minimize chemical use and manual labour.
Removing Stubborn Adhesive Residue
Adhesive residue is often the most frustrating part of removing film from windows. Solutions vary based on how stubborn the residue is:
| Adhesive Removal Method | Suitable For |
| Soap + Water + Razor Scraper | Light, fresh residue |
| Ammonia-Based Cleaners | Moderate to stubborn glue |
| Vinegar & Baking Soda Paste | Natural, less-toxic alternative |
| Commercial Adhesive Removers | Heavy-duty, professional-grade glue |
Apply solutions generously, allow them to dwell for several minutes, and scrape gently to lift the softened adhesive.
How to Remove Window Film from Different Window Types
Each window type demands specific caution:
- Double-pane windows: Internal seals and defogging lines are sensitive; excessive pressure can break the seals.
- Tinted Windows: Plastic tools only; metal blades can damage the tint layer permanently.
- Automotive Windows: Protect adjacent electrical systems; moisture infiltration can cause severe damage.
- Skylights or High Windows: Safety is paramount; use extension tools or hire professionals to prevent accidents.
"Understanding your window's construction minimizes the risk of unintentional, costly damage," reminds Helen Sin .
Aftercare: Cleaning the Glass for a Streak-Free Finish
Once removing window film is removed, proper aftercare ensures your glass looks brand new:
- Choose the right cleaner: Use ammonia-free, streak-free solutions to avoid residue.
- Inspect under angled light: A flashlight reveals hidden smears and glue patches.
- Polish gently: Circular buffing with microfiber cloths gives a clean, polished appearance.
If planning a new film application, waiting 24–48 hours allows moisture trapped between glass pores to evaporate entirely.

Common Mistakes to Avoid
DIY efforts often falter due to common mistakes. Avoid:
- Rushing the peeling process , which causes tearing and increases the adhesive mess.
- Using sharp razors directly on coated or tinted glass.
- Neglecting surface protection, risking damage to window frames and surrounding decor.
- Applying inconsistent heat, leading to patchy adhesion and labour-intensive peeling.
- Ignoring warranty conditions, unauthorized film removal may void window warranties.
"Patience and preparation are your best tools for a flawless outcome," says Tony Wong .
When to Call a Professional
Specific scenarios demand expert handling:
| Situation | Reason |
| Large commercial films | Specialized equipment needed |
| Thick security films | Requires industrial tools |
| High or awkward windows | Safety risks without professional gear |
| Glass with embedded electronics | Risk of irreparable damage |
Cost Comparison:
| Method | Estimated Cost |
| DIY | Minimal (tools, time) |
| Professional | Moderate to High (depends on film size and complexity) |
Professional services often include warranties and damage protection, making them a wise choice for challenging projects.
Prepping for New Window Film Application
After completing how to remove window film from house windows, prepping the glass properly ensures a smooth transition to the new film:
- Drying Period: Allow at least 24 to 48 hours for drying time.
- Surface Check: Remove every trace of old adhesive to prevent bubbles in the new film.
- Film Selection: Choose energy-saving, UV-protective, or privacy-enhancing films to suit your specific needs and climate conditions.
Thoughtful preparation extends the life and performance of the new installation.
Take It Slow and Do It Right
Window film removal is a detailed process that rewards patience. Thorough preparation, gentle methods, and attention to detail preserve both the integrity and appearance of your windows. Whether you tackle the project yourself or hire a professional, understanding each step ensures the final result is clear, clean, and satisfying.
FAQs
How to remove window film effectively?
Use either the heat-and-peel or black bag method, depending on the film type and window location.
What is window film?
Window film is a thin laminate applied to glass surfaces for purposes like privacy, UV protection, decorative effects, and energy efficiency.
How to remove film from windows without damage?
Apply consistent heat, peel slowly, and use plastic tools designed for delicate surfaces.
How to remove privacy film from windows?
Gently heat the film and peel away; treat any adhesive residue with a safe cleaning solution.
How to remove window film from house windows?
Identify the film type, use appropriate methods like heating or black bagging, and finish with a thorough adhesive cleanup.

1000’s of Colours & Textured Finishes
Transform your home from ordinary to extraordinary with our new coloured and non-glare textured finishes. Available in a wide array of colours as well as custom matched colours for your very own personalized design.
Our Most Popular Replacement Window Colours: