Replacing Windows in a 100-Year-Old House: A Step-by-Step Guide for Canadian Homeowners
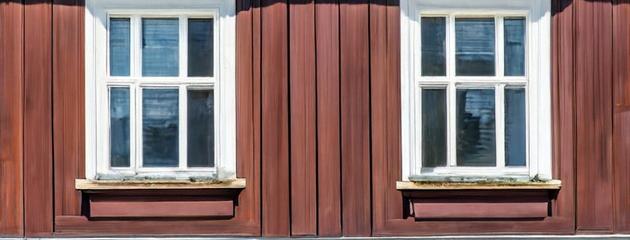

Did you know that up to 25% of a home's heating and cooling costs can be attributed to inefficient windows? Replacing outdated windows in a 100-year-old house is a crucial upgrade that can significantly reduce energy bills while enhancing aesthetics and functionality - a win-win for Canadian homeowners seeking to preserve their historic homes while embracing modern efficiencies.
This comprehensive step-by-step guide will walk you through the process of replacing windows in a 100-year-old house and covers:
- Step 1: Assess Your Current Windows
- Step 2: Choose the Right Replacement Windows
- Step 3: Obtain Necessary Permits and Approvals
- Step 4: Prepare the Work Area
- Step 5: Remove the Old Windows
- Step 6: Install the New Windows
- Step 7: Finishing Touches
- Step 8: Enjoy Your New Windows
- Additional Tips and Considerations
Step 1: Assess Your Current Windows
Before embarking on your window replacement journey, it's crucial to evaluate the condition of your existing windows. Here's what you need to look for:
- Energy Efficiency: Older windows often lack proper insulation and sealing, resulting in drafts, heat loss, and higher energy bills. Look for signs of condensation, drafts, and excessive heat transfer.
- Structural Integrity: Inspect the frames for signs of rot, warping, or damage. These issues can compromise the windows' structural stability and potentially lead to safety hazards.
- Operability: Check if the windows open, close, and lock properly. Stuck or jammed windows can pose security risks and make egress difficult in case of emergencies.
- Aesthetic Appeal: Evaluate the overall appearance of your windows. Outdated designs, faded colours, or cracked glass can diminish your home's curb appeal.
Once you've identified the areas that need improvement, you can better plan your window replacement project and determine the scope of work required.

Step 2: Choose the Right Replacement Windows
Selecting the appropriate replacement windows is crucial for ensuring long-term satisfaction and energy efficiency. Consider the following factors when making your choice to replace windows:
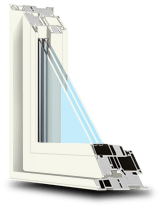
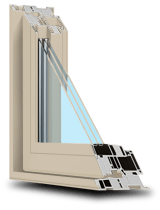
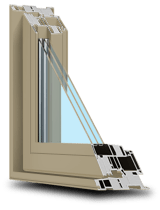
- Window Materials: Common options include vinyl, wood, fibreglass, and aluminium. Each material has its own advantages and disadvantages in terms of durability, maintenance, and energy efficiency. We highly recommend euro vinyl windows for their durability, quality, and energy efficiency.
- Window Styles: Determine the style that best complements your home's architecture and your personal preferences. Popular choices for older homes include double-hung, casement, and bay windows.
- Energy Efficiency Ratings: Look for windows with high energy efficiency ratings, such as those certified by Energy Star or the National Fenestration Rating Council (NFRC). These ratings will help you evaluate the windows' thermal performance and potential energy savings.
- Low-Emissivity (Low-E) Coatings: Low-E coatings can help reduce heat transfer and improve energy efficiency by reflecting infrared light.
- Gas Fills: Inert gas fills, such as argon or krypton, can enhance insulation properties by reducing heat transfer between panes of glass.
It's also advisable to consult with window professionals or energy advisors to ensure you make an informed decision that aligns with your specific needs and climate conditions.
Step 3: Obtain Necessary Permits and Approvals
Depending on your location and the extent of the project, you may need to obtain permits or approvals from your local authorities before proceeding with the window replacement. This is particularly important for older homes, as there may be specific regulations or guidelines in place to preserve the historic character of wooden windows in the building.
Contact your municipal building department to inquire about the necessary permits and approvals required for your project. Additionally, if your home is located in a designated heritage district or is registered as a historic property, you may need to seek approval from the appropriate heritage conservation authorities.
Step 4: Prepare the Work Area
Proper preparation is essential for a smooth and efficient window replacement process. Follow these steps to ensure a safe and organized work environment:
- Clear the area around each window, removing any furniture, curtains, or other obstructions.
- Protect the surrounding surfaces with drop cloths or plastic sheeting to prevent damage from dust and debris.
- Ensure adequate ventilation by opening nearby windows or doors, or setting up fans to circulate air.
- Have the necessary tools and materials on hand, such as utility knives, pry bars, caulking guns, and any specific tools recommended by the window manufacturer.
Step 5: Remove the Old Windows
Once the work area is prepared, it's time to remove the old windows. Follow these steps carefully to avoid damaging the surrounding wall or window openings:
- For Wood Windows: Use a utility knife or pry bar to carefully cut through the caulking or sealant around the window frame. Be cautious not to damage the surrounding wall or trim.
- For Vinyl or Aluminium Windows: Locate and remove any screws or fasteners securing the window frame to the wall. Some frames may have clips or flanges that need to be disengaged.
- For All Window Types: After loosening the frame, gently pry the window out of the opening, taking care not to exert excessive force that could damage the surrounding wall or trim.
- Inspect the Opening: Once the old window is removed, inspect the opening for any signs of rot, mould, or structural damage. Address these issues before proceeding with the new window installation.
Step 6: Install the New Windows
With the old windows removed and the openings prepared, it's time to install the new windows. Follow the manufacturer's instructions carefully and consider hiring a professional if you're unsure about any part of the process.
- Prepare the Opening: Clean the opening thoroughly and apply any necessary sealants or flashing to ensure a proper seal and prevent water infiltration.
- Install the Window Frame: Carefully position the new window frame into the opening, ensuring it's level, plumb, and square. Use shims or adjustable brackets to secure the frame in place if necessary.
- Secure the Window: Follow the manufacturer's instructions to properly secure the window frame to the wall using screws, nails, or other fasteners provided.
- Seal and Insulate: Apply caulking or sealant around the perimeter of the window frame to create an airtight seal. If required, add insulation around the frame to improve energy efficiency.
- Install Hardware and Accessories: Attach any necessary hardware, such as locks, operators, or window treatments, according to the manufacturer's guidelines.
Step 7: Finishing Touches
Once the new windows are installed, it's time to add the finishing touches to ensure a seamless and polished look:
- Exterior Trim: Install exterior trim or casing around the windows to cover any gaps and provide a clean, finished appearance.
- Interior Trim: Install interior trim or casing to match the existing style and aesthetic of your home.
- Caulking and Sealants: Apply caulking or sealants around the interior and exterior trim to create a continuous, airtight seal.
- Paint or Stain: If necessary, paint or stain the new trim to match the existing colour scheme of your home.
- Clean Up: Remove any debris, drop cloths, or protective materials from the work area, and clean the windows thoroughly to remove any dirt or residue.
Step 8: Enjoy Your New Windows
Congratulations! You've successfully replaced the windows in your 100-year-old home. Take a step back and admire the improved energy efficiency, enhanced curb appeal, and increased functionality that your new windows provide. Enjoy the benefits of your hard work and the satisfaction of preserving the character of your historic home while embracing modern upgrades.
Additional Tips and Considerations
- Hire Professionals: While window replacement can be a DIY project, it's often advisable to hire professional window installers, especially for larger or more complex projects. They have the expertise and experience to ensure proper installation and adherence to building codes and regulations.
- Consider Window Coverings: New windows may require updated window coverings, such as curtains, blinds, or shutters. Plan for this additional expense and factor in the aesthetic impact on your home's interior design.
- Maintain Your New Windows: Proper maintenance is key to ensuring the longevity and performance of your new windows. Follow the manufacturer's recommendations for cleaning, lubrication, and periodic inspections.
- Take Advantage of Rebates and Incentives: Many Canadian provinces and municipalities offer rebates or incentives for homeowners who undertake energy-efficient upgrades, such as window replacements. Research Canada’s Greener Homes Grant.
Conclusion
Replacing windows in a 100-year-old home is a significant undertaking that requires careful planning, preparation, and execution. By following this step-by-step guide, you'll be equipped with the knowledge and tools to navigate the process successfully. Remember, patience, attention to detail, and a commitment to preserving the historic character of your home will ensure a rewarding and satisfying outcome.
Whether you tackle this project yourself or enlist the help of professionals, the benefits of installing new, energy-efficient windows will be evident in your reduced energy bills, improved comfort, and enhanced curb appeal. Embrace the opportunity to breathe new life into your century-old home while respecting its rich history and charm.
FAQs
Can I install replacement windows without removing the existing window frames?
In some cases, you may be able to install replacement windows within the existing window frames, a process known as an insert or pocket replacement. However, for older homes with deteriorated or damaged window frames, a full frame replacement is often recommended to ensure proper installation, insulation, and air sealing.
What are the benefits of full frame replacement windows over insert replacement windows?
Full frame replacement windows involve removing the entire old window frame and installing a new window unit directly into the surrounding walls. This approach offers several advantages, including improved energy efficiency, better sealing against air and water leaks, and the opportunity to address any structural issues with the existing window opening or surrounding walls.
Are vinyl replacement windows a good choice for a 100-year-old house?
Vinyl replacement windows can be an excellent choice for older homes, as they offer superior energy efficiency, low maintenance, and a wide range of styles to complement the historic character of the house. However, it's essential to choose high-quality vinyl windows from reputable manufacturers to ensure durability and longevity.
How do I determine if my old house windows need to be replaced?
There are several signs that your old house windows may need replacement, including drafts, condensation buildup, difficulty opening or closing, cracked or broken glass, and visible signs of rot or deterioration in the window frames or surrounding walls.
Can I replace just one window at a time, or do they all need to be done together?
While it's possible to replace windows one at a time, it's generally recommended to replace all the windows on the same side of the house or within the same room at once. This ensures a consistent appearance and uniform energy efficiency throughout the space.
How do I prepare the existing window opening for a replacement window installation?
Before installing a new replacement window, it's crucial to prepare the existing window opening properly. This may involve removing the old window frame, inspecting and repairing any damage to the surrounding walls, and ensuring the opening is clean, level, and properly flashed to prevent water infiltration.
What should I do with the old window frames and glass after removing them?
Depending on your local regulations, you may need to dispose of the old window frames and glass properly. Some municipalities have specific guidelines for handling construction waste, or you may be able to take advantage of recycling programs for certain materials. It's always best to check with your local authorities for the proper disposal methods.

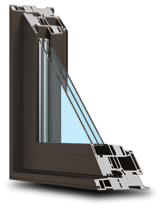
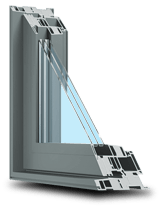
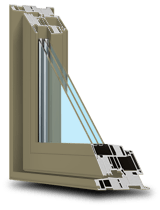
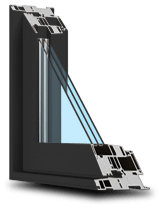
1000’s of Colours & Textured Finishes
Transform your home from ordinary to extraordinary with our new coloured and non-glare textured finishes. Available in a wide array of colours as well as custom matched colours for your very own personalized design.
Our Most Popular Replacement Window Colours:

Take advantage of Canada’s Greener Homes Grant today!
Save thousands off your new window and door installation. Find out if you qualify!